How to integrate Netlify with my Greta project?
Deploy your Greta project using Netlify, leveraging its hosting, continuous deployment, and serverless functions.
How to integrate Netlify with my Greta project ?
Step 1: Create & Deploy Your Greta Website
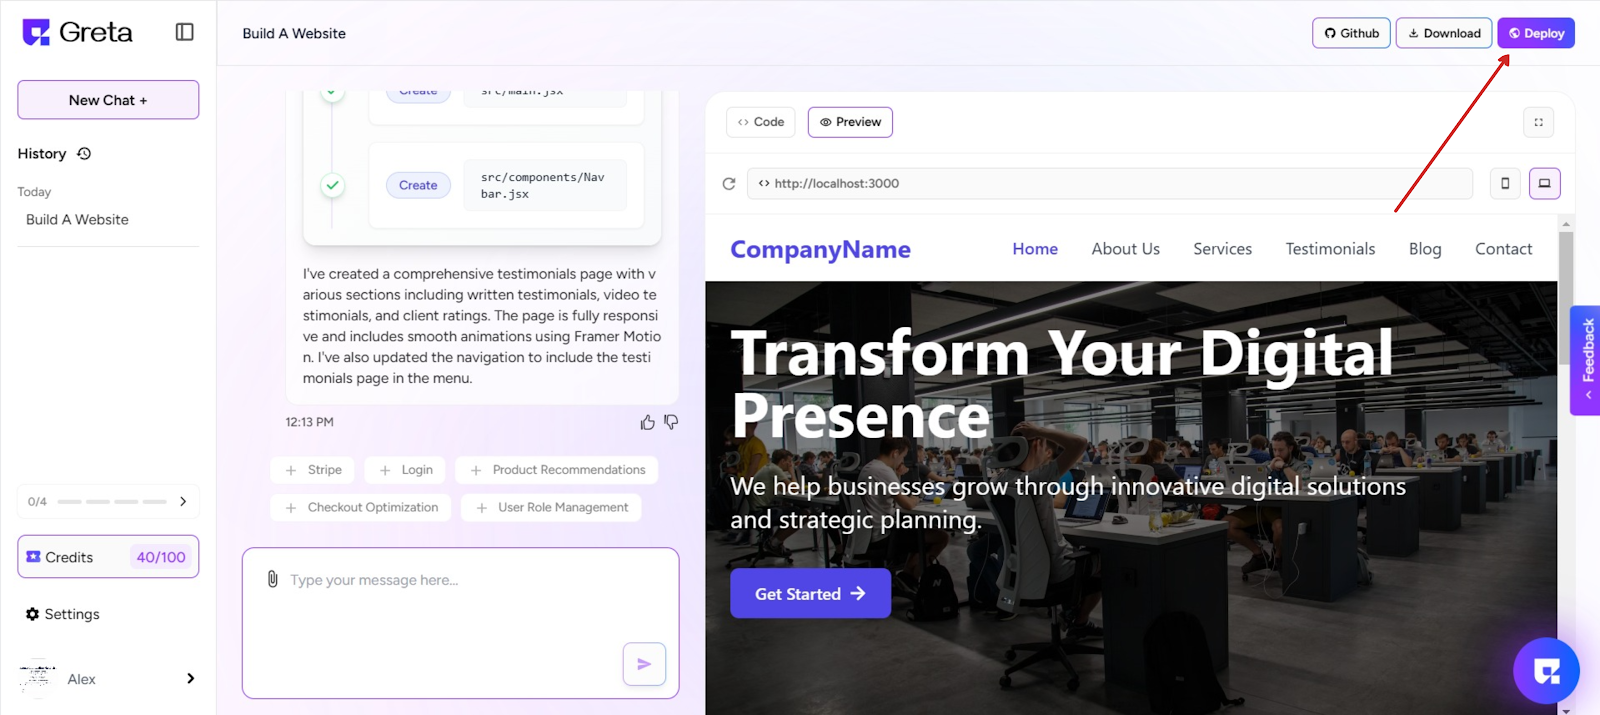
1. Go to Greta and create your website.
2. Once you're done, click the “Deploy” button.
3. Greta will now build and deploy your site.
Step 2: Claim the Site via Netlify
4. After deployment, you’ll see a “Claim” button on the top-right.
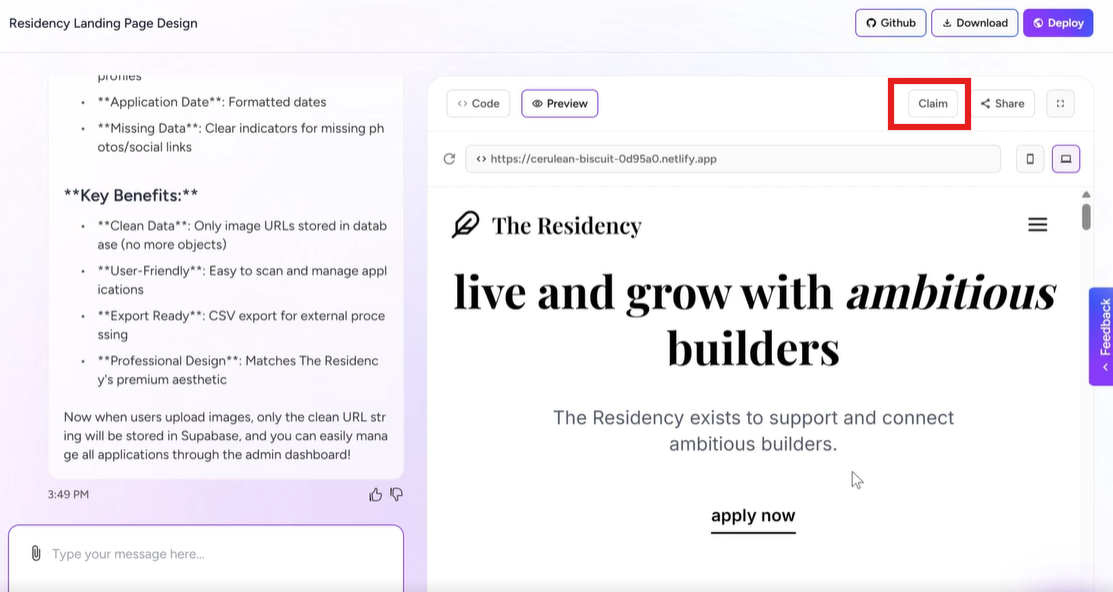
5. Click on “Claim Site Now” – this will redirect you to Netlify.
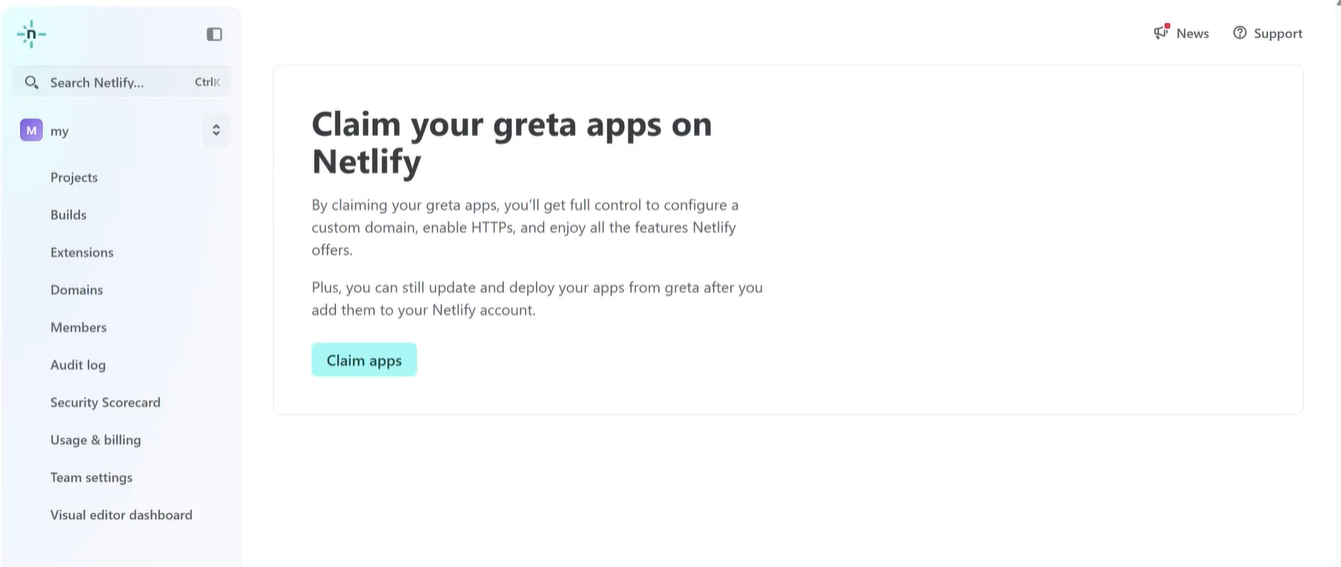
6. On Netlify, click “Claim App Now” to take ownership of the deployed site.
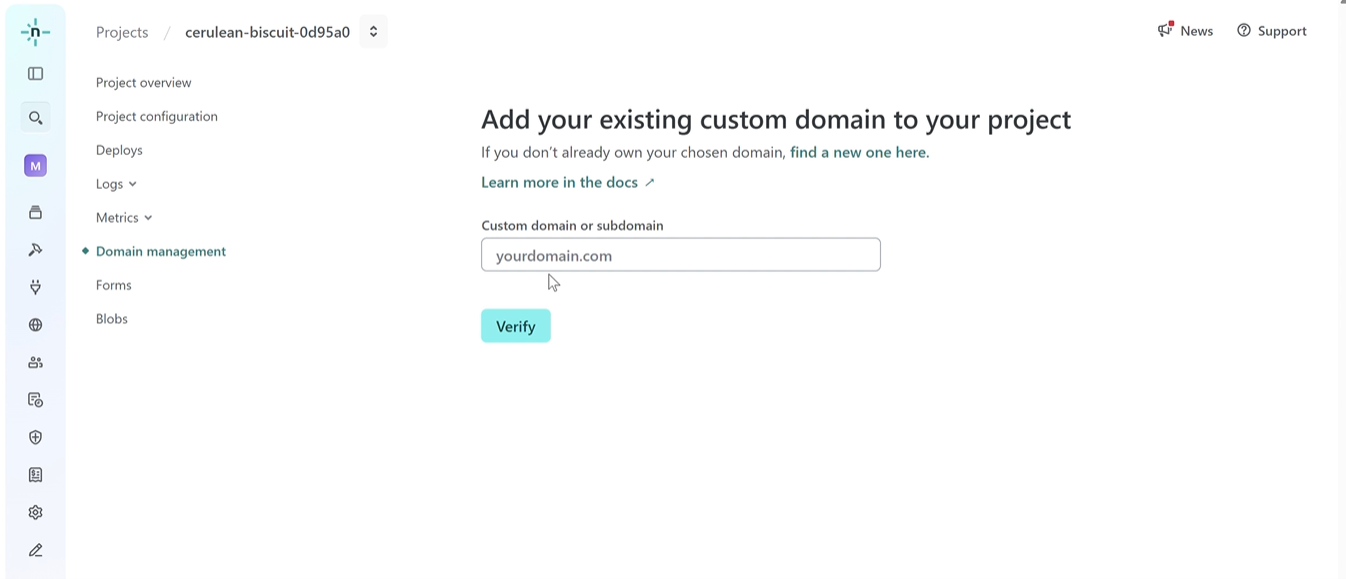
Step 3: Add a Custom Domain
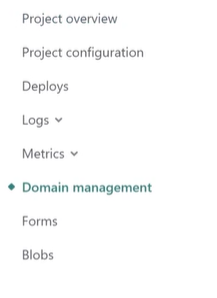
7. On Netlify, go to the “Domain Management” section.
8. Click “Add a domain” → then choose “Add a domain you already own”.

9. Enter your custom domain (e.g., yourdomain.com) or a subdomain (e.g., app.yourdomain.com).
Step 4: Configure DNS Settings
10. Once you add your domain, Netlify will show you two key pieces of info:
- Host
- Value
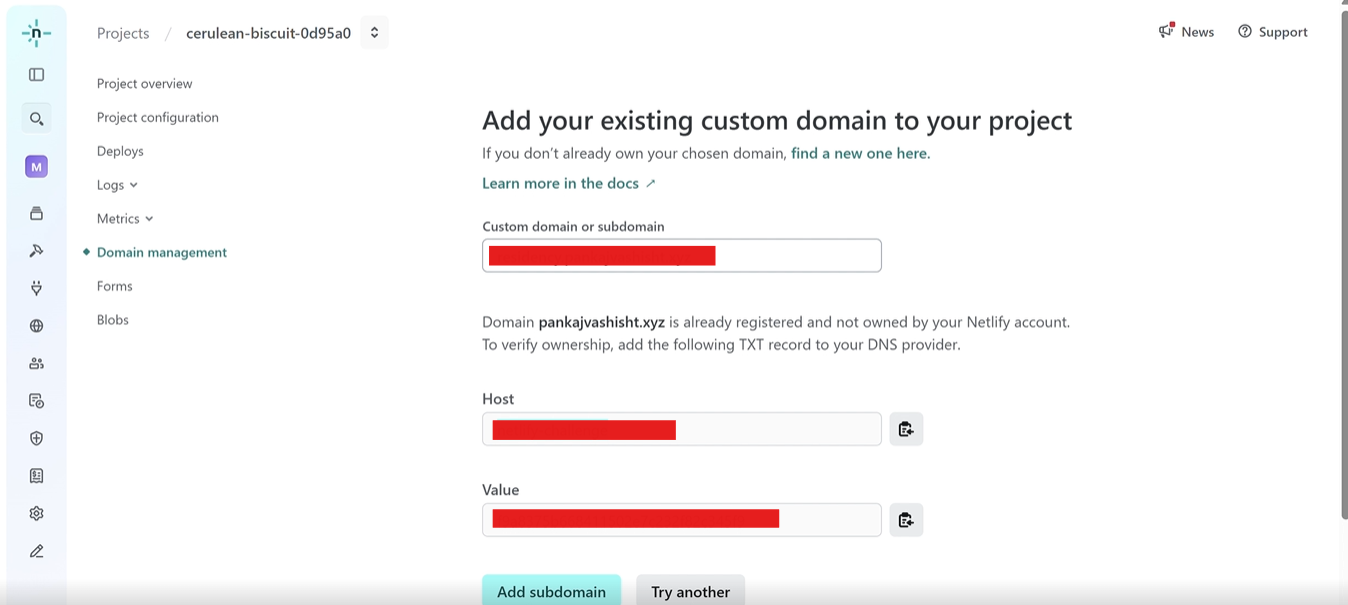
11. Copy these values and go to your DNS provider (e.g., GoDaddy, Namecheap, Cloudflare).
12. In your DNS provider's dashboard
- Add a CNAME record using the Host/Name and Value/Target Netlify provided.
13. Save the changes
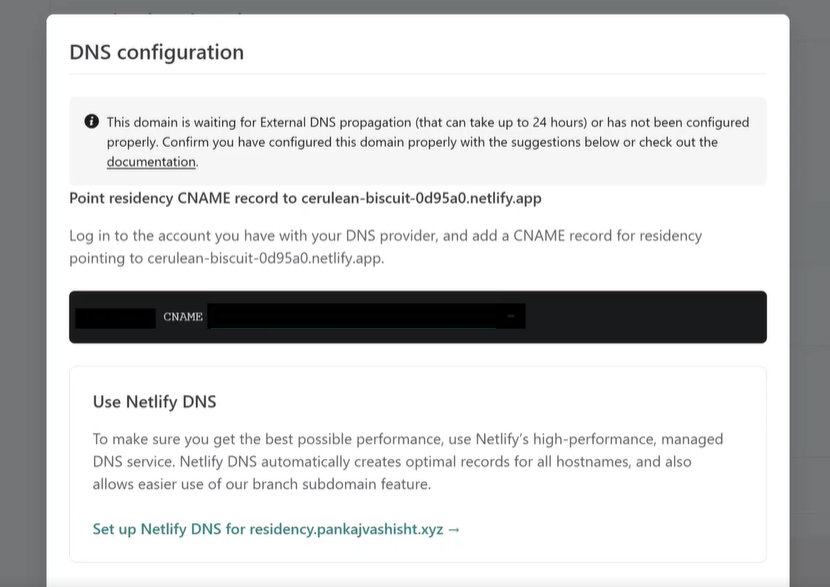
Step 5: Verify and Finalize
14. Go back to Netlify and click “Verify” or “Refresh”.

15. Once verified, your Greta website will now be live on your own custom domain.