How can I integrate Stripe payments into my website using Greta?
Learn how to set up and integrate Stripe payments into your website using Greta's payment integration features.
How can I integrate Stripe payments into my website using Greta?
Setting up Stripe on your website with Greta is simple and seamless. Follow these four steps to enable payments and customize your payment plans:
Step 1: Select Stripe as a Payment Component
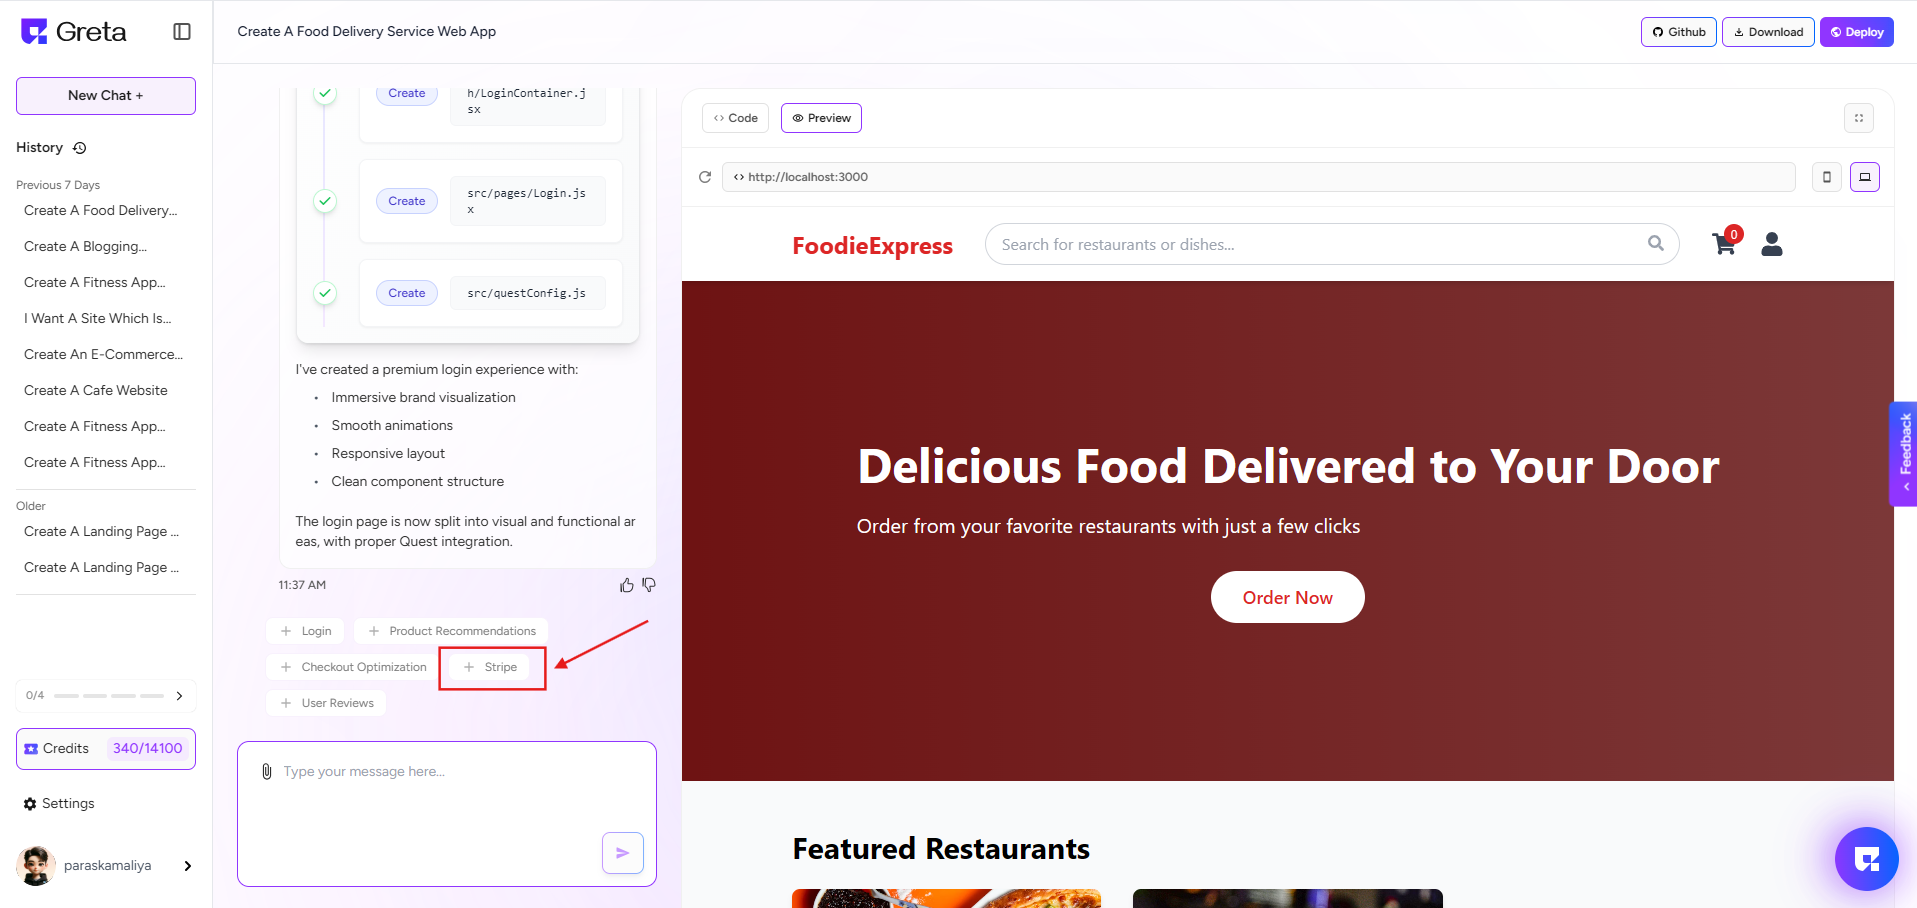
After building your website with Greta, you will see a list of suggested components to enhance your site. Select Stripe from the list to enable online payments. A tab will open asking for your Secret Key, which is required to connect your Stripe account.
Step 2: Enter Your Secret Key
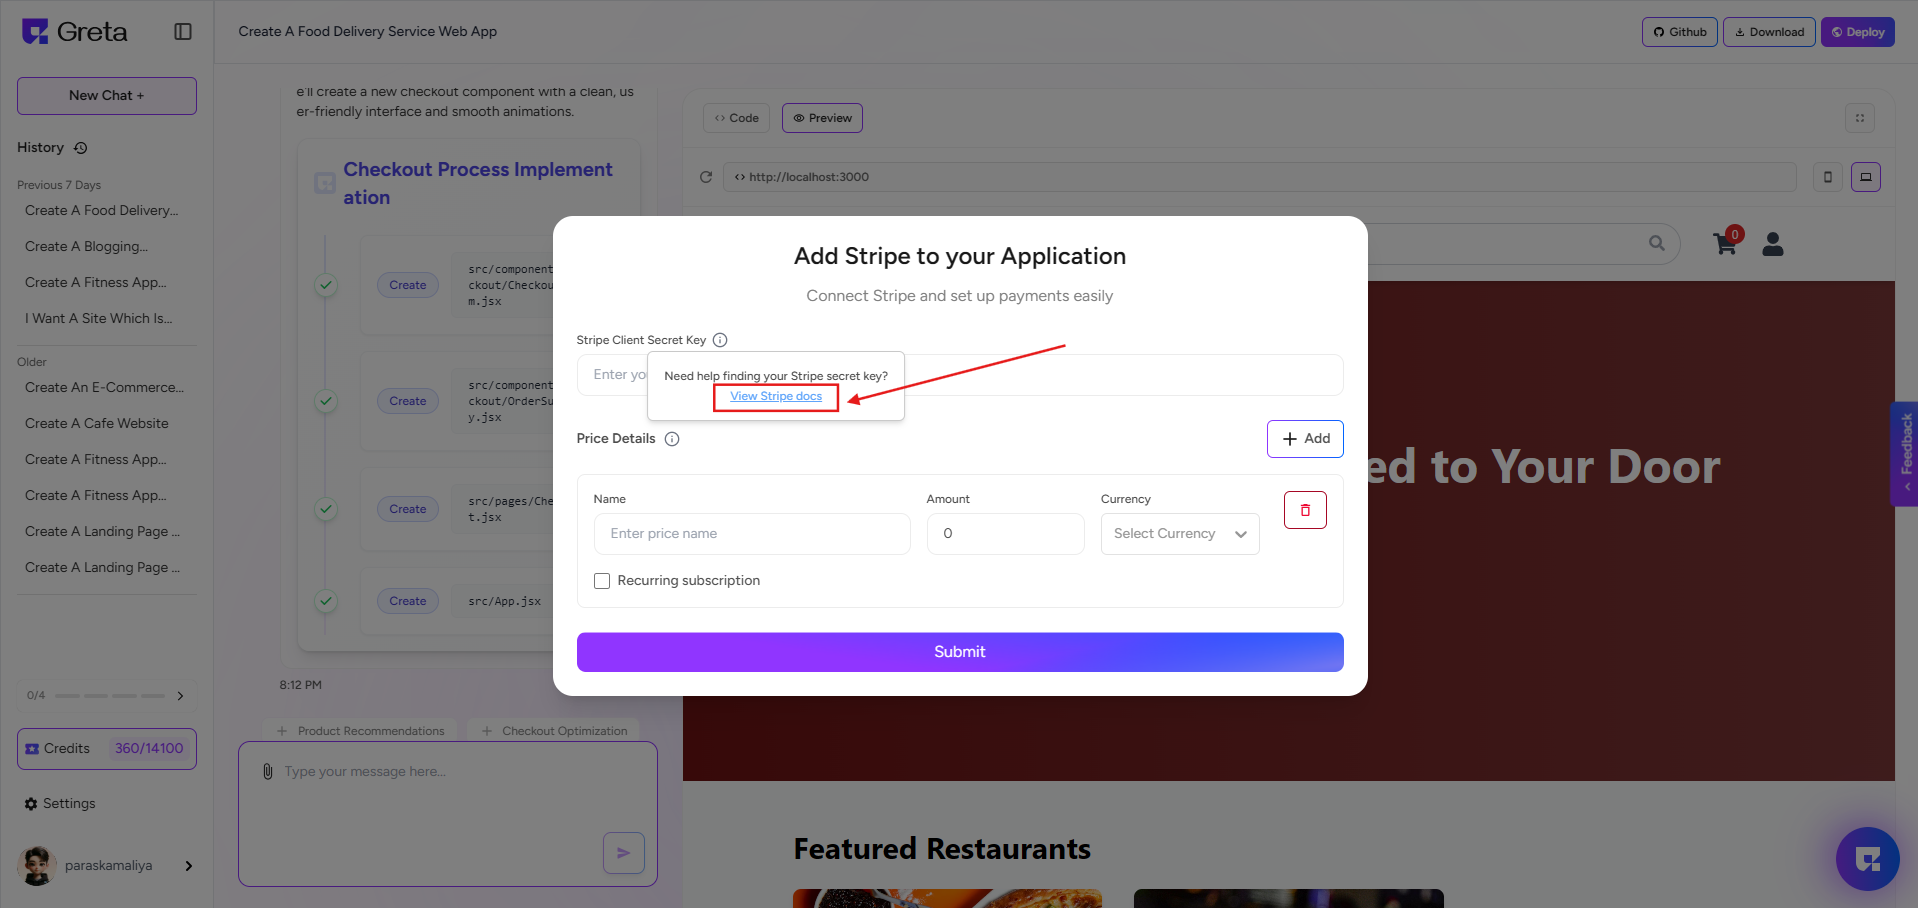
To proceed, you need to enter your Stripe Secret Key. If you don’t have it, click on "How to get it" within the same tab to find instructions on retrieving it from your Stripe account. Once you enter the key, Stripe integration will be activated on your website.
Step 3: Add Payment Plans
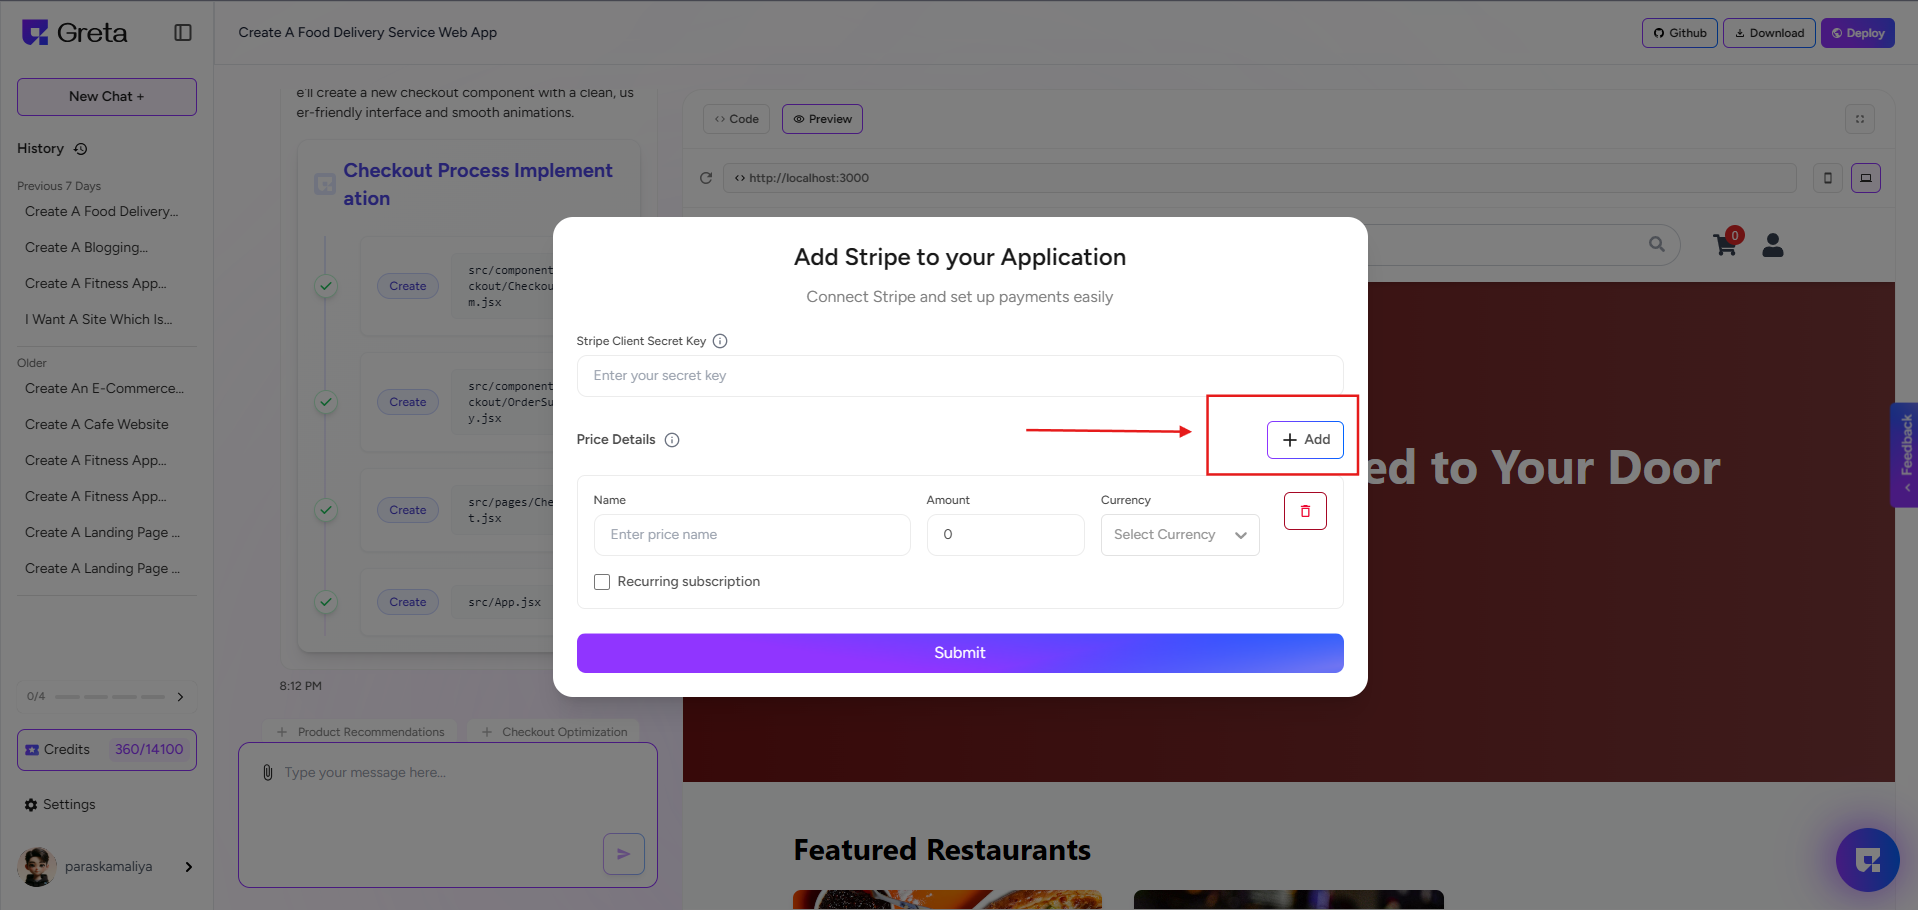
To configure payments, click "Add" on the bottom of the page. You can now set up different payment options by entering details such as the plan name, amount, currency, and payment type. If you're offering a subscription-based plan, select whether it should be billed monthly or yearly. After entering these details, click "Submit" to save your payment plans.
Step 4: Preview and Launch Your Website
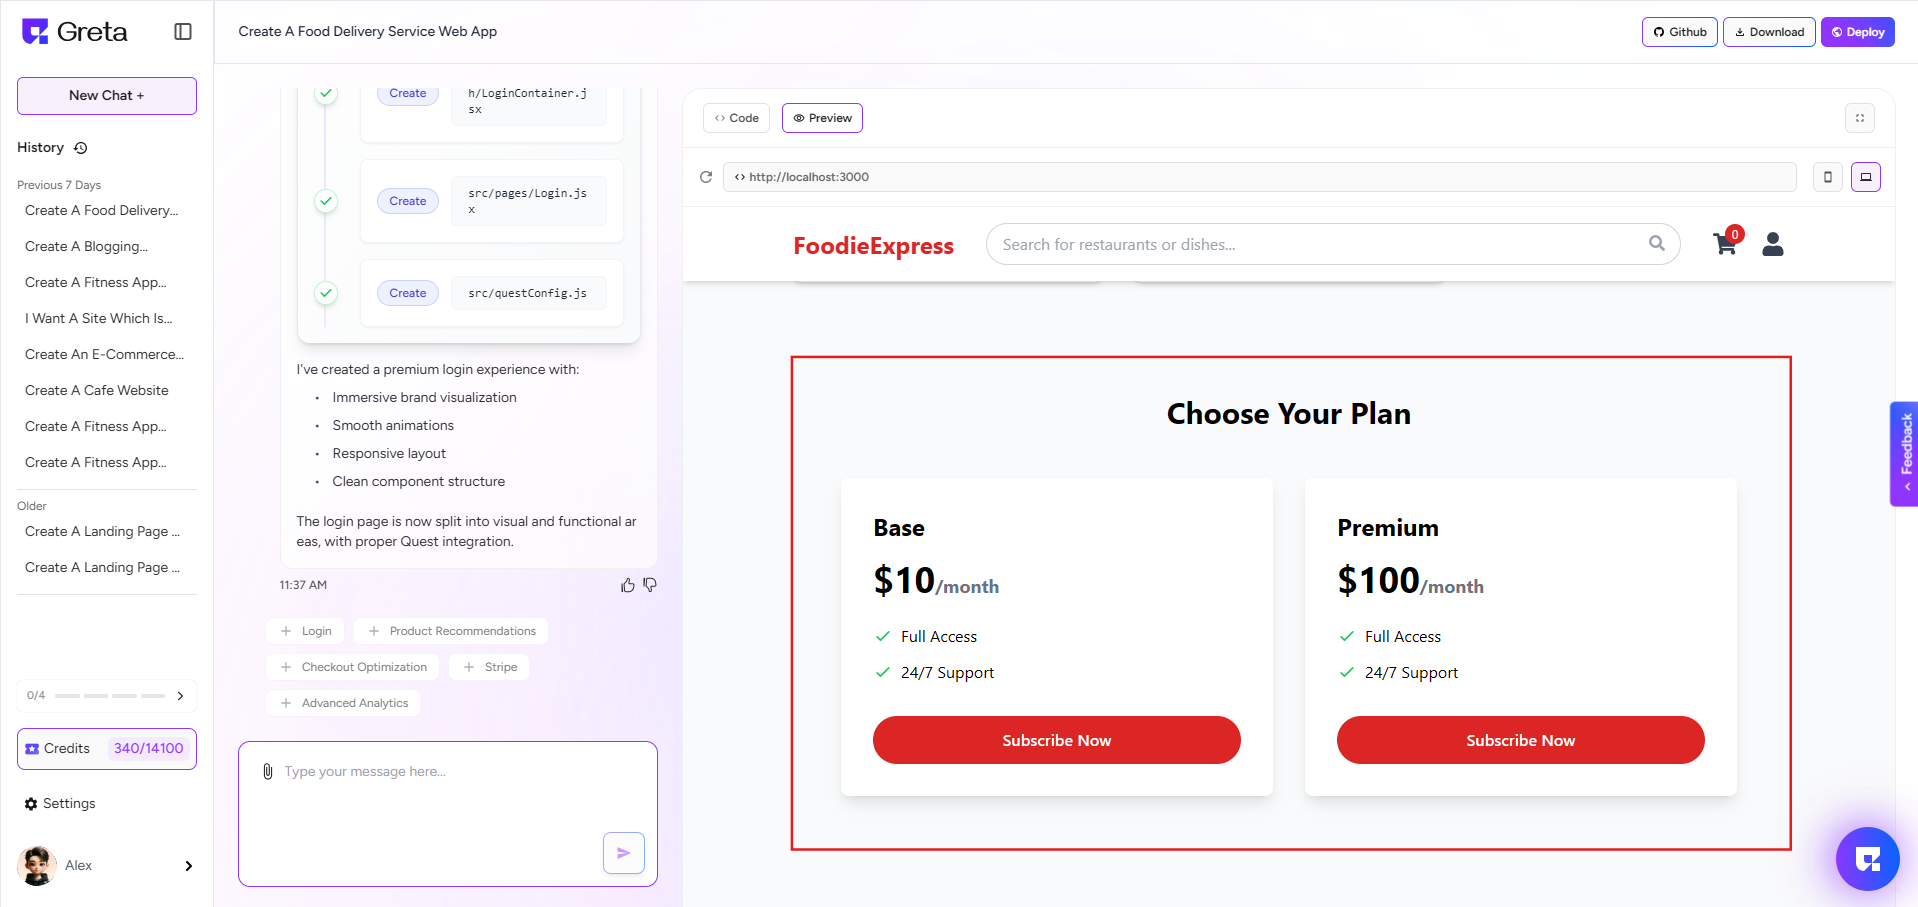
Once your payment setup is complete, your website will automatically reload. You can now preview how the payment options appear on your site to ensure everything is working correctly. With Stripe successfully integrated, your website is ready to accept secure online payments.